Running LinuxCNC on fresh Debian Jessie (8) install using custom compiled longterm kernel 4.1.15.
Start with a fresh install of Debian.
Most of the step can be done as a normal user. For apt-get and dpkg commands log in as root or use sudo.
Compile Kernel 4.1.15 with RT patch
With some help from https://rt.wiki.kernel.org/index.php/RT_PREEMPT_HOWTO and http://www.cyberciti.biz/faq/debian-ubuntu-building-installing-a-custom-linux-kernel/ .
Install required tools
# apt-get install build-essential ncurses-dev fakeroot kernel-package
Extract kernel and patch
# mkdir /opt/kernel
# cd /opt/kernel
# wget https://cdn.kernel.org/pub/linux/kernel/v4.x/linux-4.1.15.tar.xz
# wget https://www.kernel.org/pub/linux/kernel/projects/rt/4.1/patch-4.1.15-rt17.patch.gz
# tar xvf linux-4.1.15.tar.xz
# gzip --decompress patch-4.1.15-rt17.patch
# cd linux-4.1.15
# cat ../patch-4.1.15-rt17.patch | patch -p1
Copy current kernel config into this build
# cp /boot/config-$(uname -r) .config
Configure kernel
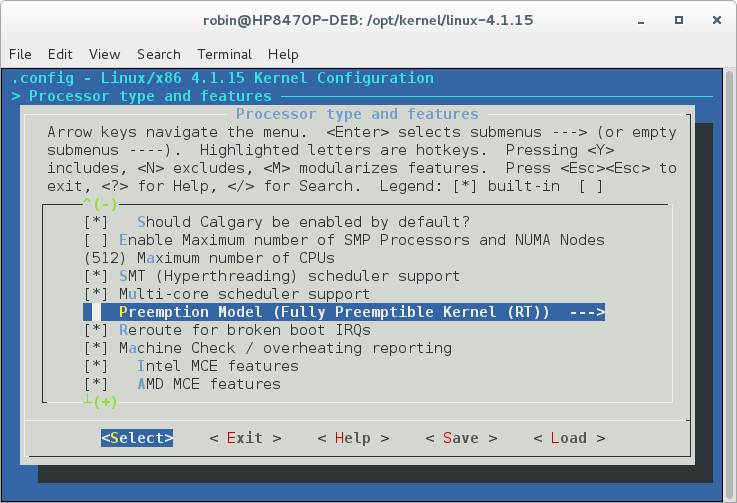
# make menuconfig
-> Processor type and features
-> -> Preemption Model (Fully Preemptible Kernel (RT))
-> -> Timer frequency (1000 HZ)
<Save>
Compile kernel
# make-kpkg clean
# fakeroot make-kpkg -j4 --initrd kernel_image kernel_headers
Where -j specifies number of cpu cores.
This might take a while and raise room temperature. 🙂
Installing kernel
Execute de following commands as root or use sudo.
# cd ..
# dpkg -i linux-headers-4.1.15-rt17-10.00.Custom_amd64.deb
# dpkg -i linux-image-4.1.15-rt17-10.00.Custom_amd64.deb
# shutdown -r now
Adding LinuxCNC repository to APT
I do not compile my own LinuxCNC, maybe later, for now i am using LinuxCNC APT archive.
Follow http://linuxcnc.org/docs/html/getting-started/getting-linuxcnc.html#_installing_on_debian_wheezy_with_preempt_rt_kernel
Run the following commands as user root or use sudo.
Add the LinuxCNC Archive Signing Key to your apt keyring:
# apt-key adv --keyserver hkp://keys.gnupg.net --recv-key 3cb9fd148f374fef
Now edit /etc/apt/sources.list and add the following line:
deb http://linuxcnc.org/ jessie base 2.7-uspace
and update aptitude.
# apt-get update
Now you can install LinuxCNC by using this line:
# apt-get install linuxcnc-uspace
Please let me know if i wrote something wrong.